
How To Install The Dimplex Q-Rad Electric Panel Heaters
How to Install the Dimplex Q-Rad Electric Panel Heaters
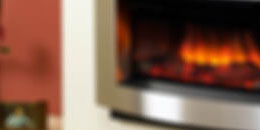
The Dimplex QRAD electric panel heaters are leading the way in the electric panel heating market at present, packed full of energy saving features to deliver maximum comfort at minimum cost to the user.
But there’s more….the QRAD panel heaters are also quick and easy to fit, taking as little as 15 minutes from start to finish. Here’s quick step by step guide to help you along the way –
Step-by-Step Guide
Installation tools required: Cross head magnetic screwdriver, Drill, Wiring / Clipping pliers, Measuring tape and Spirit level.
1. Where to place the radiator
When choosing where to place the Q-Rad electric radiator, ensure that there are no obstructions nearby – keeping a safe distance from curtains and sofas.
Objects should not be placed within 150mm of the top, sides or front of the radiator. Check the clearances to ensure that it can be fitted to the correct dimensions in the space available.

2. Getting started
Lay the box down and open the packaging from the top end. Slide the radiator out and remove the four small polystyrene pieces on each corner of the Q-Rad. Place the radiator flat on the floor, with the wall bracket facing up.

3. Measuring clearances for the radiator
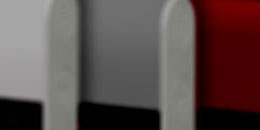
To remove the wall mounting ‘H’ bracket, press the spring latches at the top of the bracket. Measure the clearances and dimensions specified by placing the bracket against the wall, ensuring it is fixed a minimum of 260mm from the floor.

4. Fixing the bracket to the wall
Check the bracket is level and mark the four screw hole positions onto the wall using a pencil. Fix the bracket to the wall using the screws provided, tighten and ensure it is fully secured.

5. Mounting the radiator on the bracket
Lift the Q-Rad to the wall and engage the lower slots on the back of the radiator to the bottom brackets. Now raise the radiator to a vertical position, carefully pushing the radiator on to the top brackets until they engage with a ‘click,’ and check that the product is fully secured on to the wall bracket.

6. Making the electrical connections
The Q-Rad comes pre-wired and can now be easily connected to the electrical supply box, incorporating a double pole isolating switch. Complete connection and carry out the required safety tests.

7. Programming the controller
Now that radiator is fully installed, the controls, which include a state-of-the-art, touchscreen electronic user interface, can be set up using the ‘Quick Start Guide’ in the instruction booklet. As best practice, set the date, time and heating profile for the customer.

 0871 288 4236
 Email
Email


